Thursday, 4 December 2014

The Finishing of 3 little mice : baubles

I decided how I wanted to finish up my little mice designs pretty early after completing my first one. I wanted them in clear baubles to go on my sister's Christmas tree if she has one this year. (Otherwise to a friend or two who will)

I had an (admittedly very quick) look through the local shops but couldn't find what I wanted for the baubles. Though I was certain they existed. In the end I just took the easy though somewhat expensive option and brought them through ebay. Ebay is no always a bargain particularly if you take into account postage. I also had to buy 10 when I really only needed 3. But the others can be used as the manufacturer seems to recommend which is to fill with lollies or treats to hang from the tree.

I did want to use 'Iridescent Easter grass' for the other side of the bauble but you may notice that it doesn't happen to be anywhere near Easter so settled on tinsel instead. Correct festive season and locatable in abundance at a shopping centre near you!
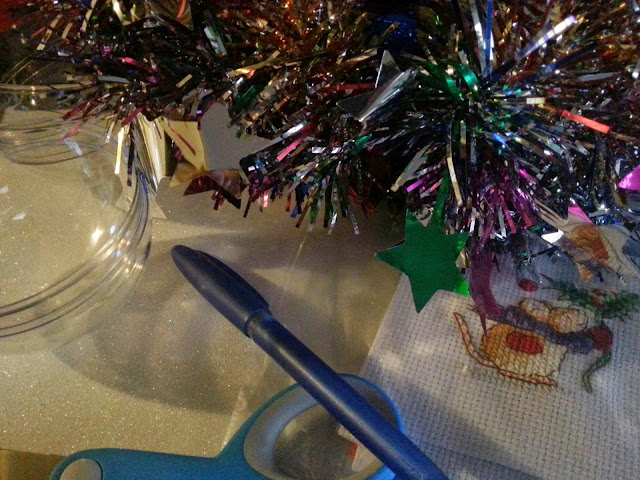
Items used:
Clear Baubles
Tinsel
White Sparkly adhesive foam
A pen
Pair of scissors (a Stanley knife would do the trick too but I've lost mine...after stabbing myself with it. I should maybe not be allowed to play with sharp object without supervision. )
...
And my finished designs of course.

First I traced around the bauble on the back of the foam making a circle. I cut out three foam circles on the inside of the line, to make them just a tiny bit smaller to fit inside the baubles. I wanted them to fit in comfortably but fixed enough the designs wouldn’t move about.

I then peeled the back of my foam circles and lined up the mouse to sit as much in the middle as possible. I was very glad I chose the 8cm baubles and not the 7.5cm ones I was tossing up with. 8cm gave just enough space to look good but allow the mouse not to have to be crazy precise. 7.5cm would have been frustratingly fiddly. 

The great thing about the foam was that it was sticky enough that I didn't have to worry about fraying. Once the mice were stuck it was comfortably I just trimmed the excess and it was ready to go. I put the design in the bauble with a little bit of tinsel on the other side. Squished it all together. And all done :)

Please excuse the reflection of my hand in a few of these photo's. 


Itty Bitty mouse (3)

So last night I finished the third and last Margaret Sherry little mousie from the World of Cross Stitch 3-in-1 kit.

This one unfortunately had a few more 'blips' in the stitching than the other two.
Firstly I don't recommend stitching while exhausted. A long 10 hours of work plus 2 hours travel time does not make for a switched on brain. I completely missed that I'd grabbed the pink instead of the peach - twice. So his feet and ears were in pink instead of peach. It wasn't too noticeable UNTIL I stitched the pink in the correct place (his cheek). Then I'm sitting there going, 'those colours look a lot alike... awhhhh shoot'

And here be my little bundle of shame, all a frogged:
 
Also during my tired stitching I didn't notice I'd picked up the white that had a bit of brown on it. It came in the kit with a smudge of brown on one end. Either somehow contaminated while getting dyed or stained some other way in transport. I was going to trim it off but accidentally used it instead. The end result is a browny cross on his belly where there should be white. It's not too noticeable and doesn't really affect the overall design so I didn't unpick the white. If I'd had to I probably would have abandoned the design.  I have a lot to do at the moment and indulging in cross stitch is just that, indulging.

It was also a little confetti-ish in some places and I missed a few crosses (4 or 5) Not hard to correct but  annoying none the less. 

So here be little mousekewitz number 3 in his finished 6x6 glory:


And one lonely little WIP shot:

Sunday, 30 November 2014

Itty Bitty mouse (2)

Little Christmas mouse number two. The second mouse from the 3-in-1 Margaret Sherry  kit that came with The World of Cross Stitch. 

I pretty much said all I wanted to say about this kit in the last post so I’ll be light on words here.

Each design is about 6x6cm and takes around 3-4hours to complete.  Definitely no more than 4hours. In this design I mixed a strand of purple metallic Madeira #4012 with the darkest purple on the bauble. It was a free sample that came with another magazine a while back. I think I should probably have added a strand to the light purple too in hindsight.  But it's too late now so I'll stick with being happy with what I've done.

I do know how I'm going to turn them into ornaments.  I'll save it till they're all done though.  Fingers cross it works (I like it when my ideas work out).

Completed project:
 

Work in progress shots:

Thursday, 27 November 2014

Itty Bitty Mouse (1)

Some actual cross stitching! Gasp. I won't have to change the name of my blog after all..maybe. 

Yay to free magazine gifts, though considering the cost of the magazine and that the 'freebies' are more than half the reason I pick up a copy not really free-free I guess. Regardless yays anyways.

This little guy is from the 3 in 1 kit that came with issue 220 of The World of Cross Stitching.  I probably don't even need to mention the designer (Margaret Sherry of course) as the design/s are very distinctive. 

I complained about the design of the fathers day card I did a while back not being really workable at the size it was. This kit on the other hand is perfect and clearly they have been designed to be stitched tiny and cute. All the definition comes from the backstitching but the cross stitch colours are exceptionally harmonious. All in all what you can expect from a Margaret Sherry design.

Also the completed design pictures in the magazine were lovely.  Whoever stitch them deserves significant kudos.

This guy was really quick to get done. A little stitching after work and here you go. One cute little mouse waiting to be turned into (I think) a Christmas ornament. 

I made a shmozzel of his tail. I couldn't really work out where I was meant to be putting my stitchs based on the chart. In hindsight I can see how I should have worked it but at the time it was a mystery.  I really just made it up, sort-a kinda. It's also a stitch longer than it should be since I accidentally added an extra cross. Being my only real mistake it doesn't really bother me too much. Still looks cute.

The only thing I though after completing the white on his hat was I should of added some metallic thread and/or blending filament to make it sparkle a bit. Woulda been pretty. Oh well too late now and it's still much cute as is.


Wednesday, 29 October 2014

Easy Upcycle; tea light burner to hanging pot


Just a quick and easy Upcycle I got the time to do today. I brought the above little pot at a Vinneis second-hand shop the other weekend for $3. It was clear that in it's previous life it had been used to burn tea lights in as the inside had a liberal amount of smoke residue. A bit of dish-washing soap and elbow grease got it cleaned up easily.

the fly-wire on top of a tea box
The holes at the bottom were too big to be used immediately as a pot. Conveniently I had stashed some old plastic fly-wire mesh that would work for covering the base and stopping my dirt from pouring straight through. I cut it to a rough circle and shoved it in the bottom. Crude but effective. 

And before anyone asks, yes I do tend to hoard random stuff - but it eventually comes in handy as seen today. (or eventually gets thrown out - whichever option comes first)

With some more hemp rope as used in my treasure chest only this time brown I created the hanging part of a hanging pot. :) Everyone should have a spool of string running around the house somewhere, it's so useful and versatile.

I cut 4 lengths twice as long as I wanted it to hang. Then I doubled them over and looped them through each hole at the top of the pot, like you would a phone strap. One string for each hole.  I then looped them all together at the top using one strand to wrap around the rest and hold them all secure.


Progress shots at this point:
Though really there were like 3 whole steps to this protect so I'm milking it a bit.
 

Add some dirt and a little succulent plant I picked up at a garage sale last weekend for just this purpose and here you go, 

done;


 I'm hoping the succulent will grow to fill the top and delicately dangle over the edges while not obscuring the pretty pot.

Sunday, 26 October 2014

STOP, and yarn bomb


And zip ties, good for so many things up to and including it seems fence beautification!


Saturday, 25 October 2014

Butterfly necklace

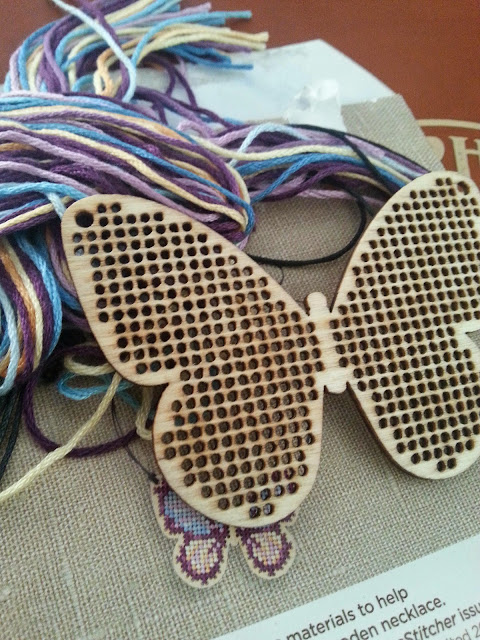
I picked up a copy of Cross Stitcher at the local newsagent the other day.  Almost entirely because it had a cat on the front and a wooden butterfly cross stitch frame. Actually not even 'almost' it WAS the entire reason.

On opening the kit I discovered I had gotten two bundles of thread...This would seem to imply that someone out there did not get their thread. So if you brought the August 2014 copy of Cross Stitcher and your free gift was missing it's bundle of floss. Hey it's at my place, drop me a line if you still need it :p

Getting two lots of floss might have been useful IF I'd ever intended to use the colours and design provided with the magazine. But no I never did. If I'm going to make a butterfly necklace then it's going to look like a real butterfly as much as I'm able to make it. And the 'jewel-toned wooden necklace' design with the magazine..? Not so much like a real butterfly. The original design as seen in the picture of the kit was designed by Angela Poole. My final product designed by me. The design size is 5.5x8cm and contains about 4hours of stitching work.

To begin I gathered some random leftover floss I had running around, black,  white, Sullivans #45300 (similar to DMC 970), what I THINK is DMC 900 or something close and from the original magazine kit DMC 3854. Googled monarch butterfly images and started stitching.  I made up the design as I went along, this seems to work well for me. 

I managed to almost immediately loose the needle from the kit. I may need to be careful where I sit/walk for the next few weeks. Fortunately I had two spare needles stuck in the black floss (lost them too, all in one evening. But these two I at least found again so no harm done).

I used a full 6 floss strands on the cross stitches rather than the usual 2 just for coverage on the wood. I considered going crazy and using 8 strands which would have been really thick and potentially luxurious looking but I didn't have that much floss and 6 seems to work well enough for me. For the backstitching I used 2 strands, I tried 1 but it just didn't stand out enough on the wings to look like a real monarch. Two worked much better although did have an annoying tendency to separate, showing the two separate lines instead of just one darker/thicker thread, I probably should have deliberately twisted it before stitching. 

The black in the design is straight forward. The orange in the bottom wings is the Sullivan #45300, in the top wings it's 4 strands Sullivans and 2 strands DMC 900. In the top corner of each of the upper wing's there is one cross in white and two in DMC 3854. 

Despite a bit of trial and error the stitching was fairly straight forward except one stupid row on the upper right wing right at the top. I stitched my crosses backwards. The whole row needed to be frogged.  While I was cutting out the incorrect stitches I managed to gouge my frame as well. This can still be seen if you look closely as the new stitches dip where the frame is damaged. Though it is slightly hidden by the backstitching now.

Lastly I coated a piece of back felt with some craft glue and covered (most) of the back. This was to obscure the stitching on the back. The felt doesn't quite cover everything but it does the job well enough. It'll make it more comfortable to wear too I expect. 

I actually spent the entire stitching experience thinking I was going to break the frame. The little guy was fairly fragile feeling and I'm a rough stuff. Fortunately it made it mostly in-tacked and looking good.

On a final note, the one thing I would recommend when working with wooden frames is a pair of pliers. Threading the needed under to tie down an end can be quite hard as the frame is unforgiving and the stitching quite tight. The pliers make it just that much easier to yank the thread through.

Finished Product;


And here be some progress picks;