Showing posts with label mouse. Show all posts

Sunday, 9 August 2015

Rest in Pieces Taxidermy Workshop

I enrolled to attend a day class in taxidermy. Read no further if you are particularly squeamish or are sensitive to the subject...!

I wasn't as focused as I would have like, my cat Fenn was on his 4th day at the vets and getting picked up (fingers crossed) by my brother while I was in the class. My brother had also torn his Achilles tendon that week. So I was stressed and pretty broke but I really wanted to do the class, I challenge you to find any other taxidermy classes in Australia. It's a pretty unique experience.

The company "Rest in Pieces" is fairly new, only founded a year or so ago and has been running full day courses/workshops to taxidermy mice (the only thing you can really do with a bunch of beginners in a day) throughout the year. 

The workshop had a maximum of 9 students, though we lost one who slept in and didn't make it in time. You really can't come in late. The group included a professional taxidermist wanting to practise something small as she usually worked on birds and restorations, one single guy (he was a giant!), some serious committed amateurs and a couple of beginner-beginners. 

The course took from 9am to 5.30ish for our group but if someone needed more time then it would have been given. No one goes home without a mouse! We learnt the basic processes involved in creating taxidermy. Learning how to skin and preserve a little mouse, as well as how to mount him into a standing pose with optional cheese. I was going to make some little props for him but the class was moved forward a month for me and I didn't have time. Someone did bring a little tutu (her mouse was tiny but the tutu was smaller so it ended up as a neck ruff - probably cuter that way regardless)

Everything was supplied on the day including the mice, tools, aprons, lunch and some (optional) wine. The mice were python feeder mice pre-frozen at the pet shop. The host named mine Chester. 

You can find more form this workshop and others @ instagram
#restinpiecestaxidermy @restinpiecestaxidermy
I don't bother with instagram so no pickies from me.

We were also advised to bring a strong tummy, I was pretty good with that until we got to the bit where we used a cotton bud to get his brain out...gross. But I got past that brief squeamishness.

After his hide was treated and we had lunch we came to the part of rebuilding our mice back into mouse shapes and not tiny little mouse skin rugs. Around then there is a point were you wire him up like a deranged marionette. There was wire sticking out everywhere. 

I hate hand stitching and at the end  we had to sew up his back. My sewing was pretty rough, and near the top I tore the skin a few times so he has a bit of a ruff where I put in multiple stitches to hold him all together. I was pretty tired by the end of the day.

I'll save you from the more gruesome pictures - well his insides no long inside anyway - the body including the tail comes out as one piece it's weird yet fascinating.  But here's the finished product and a work in progress shot (skin only)

Behold, Chester the mouse;

And some of the ambiance in the workshop; 

And a work in progress shot, the skin after removing it;

Thursday, 4 December 2014

The Finishing of 3 little mice : baubles

I decided how I wanted to finish up my little mice designs pretty early after completing my first one. I wanted them in clear baubles to go on my sister's Christmas tree if she has one this year. (Otherwise to a friend or two who will)

I had an (admittedly very quick) look through the local shops but couldn't find what I wanted for the baubles. Though I was certain they existed. In the end I just took the easy though somewhat expensive option and brought them through ebay. Ebay is no always a bargain particularly if you take into account postage. I also had to buy 10 when I really only needed 3. But the others can be used as the manufacturer seems to recommend which is to fill with lollies or treats to hang from the tree.

I did want to use 'Iridescent Easter grass' for the other side of the bauble but you may notice that it doesn't happen to be anywhere near Easter so settled on tinsel instead. Correct festive season and locatable in abundance at a shopping centre near you!

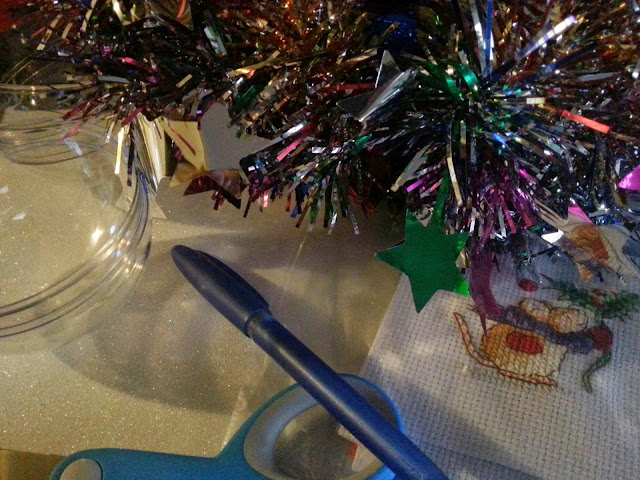
Items used:
Clear Baubles
Tinsel
White Sparkly adhesive foam
A pen
Pair of scissors (a Stanley knife would do the trick too but I've lost mine...after stabbing myself with it. I should maybe not be allowed to play with sharp object without supervision. )
...
And my finished designs of course.

First I traced around the bauble on the back of the foam making a circle. I cut out three foam circles on the inside of the line, to make them just a tiny bit smaller to fit inside the baubles. I wanted them to fit in comfortably but fixed enough the designs wouldn’t move about.

I then peeled the back of my foam circles and lined up the mouse to sit as much in the middle as possible. I was very glad I chose the 8cm baubles and not the 7.5cm ones I was tossing up with. 8cm gave just enough space to look good but allow the mouse not to have to be crazy precise. 7.5cm would have been frustratingly fiddly. 

The great thing about the foam was that it was sticky enough that I didn't have to worry about fraying. Once the mice were stuck it was comfortably I just trimmed the excess and it was ready to go. I put the design in the bauble with a little bit of tinsel on the other side. Squished it all together. And all done :)

Please excuse the reflection of my hand in a few of these photo's. 


Itty Bitty mouse (3)

So last night I finished the third and last Margaret Sherry little mousie from the World of Cross Stitch 3-in-1 kit.

This one unfortunately had a few more 'blips' in the stitching than the other two.
Firstly I don't recommend stitching while exhausted. A long 10 hours of work plus 2 hours travel time does not make for a switched on brain. I completely missed that I'd grabbed the pink instead of the peach - twice. So his feet and ears were in pink instead of peach. It wasn't too noticeable UNTIL I stitched the pink in the correct place (his cheek). Then I'm sitting there going, 'those colours look a lot alike... awhhhh shoot'

And here be my little bundle of shame, all a frogged:
 
Also during my tired stitching I didn't notice I'd picked up the white that had a bit of brown on it. It came in the kit with a smudge of brown on one end. Either somehow contaminated while getting dyed or stained some other way in transport. I was going to trim it off but accidentally used it instead. The end result is a browny cross on his belly where there should be white. It's not too noticeable and doesn't really affect the overall design so I didn't unpick the white. If I'd had to I probably would have abandoned the design.  I have a lot to do at the moment and indulging in cross stitch is just that, indulging.

It was also a little confetti-ish in some places and I missed a few crosses (4 or 5) Not hard to correct but  annoying none the less. 

So here be little mousekewitz number 3 in his finished 6x6 glory:


And one lonely little WIP shot:

Sunday, 30 November 2014

Itty Bitty mouse (2)

Little Christmas mouse number two. The second mouse from the 3-in-1 Margaret Sherry  kit that came with The World of Cross Stitch. 

I pretty much said all I wanted to say about this kit in the last post so I’ll be light on words here.

Each design is about 6x6cm and takes around 3-4hours to complete.  Definitely no more than 4hours. In this design I mixed a strand of purple metallic Madeira #4012 with the darkest purple on the bauble. It was a free sample that came with another magazine a while back. I think I should probably have added a strand to the light purple too in hindsight.  But it's too late now so I'll stick with being happy with what I've done.

I do know how I'm going to turn them into ornaments.  I'll save it till they're all done though.  Fingers cross it works (I like it when my ideas work out).

Completed project:
 

Work in progress shots:

Thursday, 27 November 2014

Itty Bitty Mouse (1)

Some actual cross stitching! Gasp. I won't have to change the name of my blog after all..maybe. 

Yay to free magazine gifts, though considering the cost of the magazine and that the 'freebies' are more than half the reason I pick up a copy not really free-free I guess. Regardless yays anyways.

This little guy is from the 3 in 1 kit that came with issue 220 of The World of Cross Stitching.  I probably don't even need to mention the designer (Margaret Sherry of course) as the design/s are very distinctive. 

I complained about the design of the fathers day card I did a while back not being really workable at the size it was. This kit on the other hand is perfect and clearly they have been designed to be stitched tiny and cute. All the definition comes from the backstitching but the cross stitch colours are exceptionally harmonious. All in all what you can expect from a Margaret Sherry design.

Also the completed design pictures in the magazine were lovely.  Whoever stitch them deserves significant kudos.

This guy was really quick to get done. A little stitching after work and here you go. One cute little mouse waiting to be turned into (I think) a Christmas ornament. 

I made a shmozzel of his tail. I couldn't really work out where I was meant to be putting my stitchs based on the chart. In hindsight I can see how I should have worked it but at the time it was a mystery.  I really just made it up, sort-a kinda. It's also a stitch longer than it should be since I accidentally added an extra cross. Being my only real mistake it doesn't really bother me too much. Still looks cute.

The only thing I though after completing the white on his hat was I should of added some metallic thread and/or blending filament to make it sparkle a bit. Woulda been pretty. Oh well too late now and it's still much cute as is.