Friday, 30 March 2018

AKA: the Christmas Pudding Chicken-Robin

I has a old magazine "freebie' stitch kit running around on the floor so I decided to do it to get it out of the way.

It's alway a bit hit and miss with these old kits if I still have the magazine they came with, and therefore have the pattern. I gave heaps to the second hand shop a while back.

In this case I didn't even look, just did a search and found the magazine on a Russian website. (CrossStitcher issue 298). The picture of the pattern was a bit blurry so it was really hard to follow the backstitching but I suppose that's my punishment for being too lazy to see if the magazine was still running around the house and visiting a website of questionable copyright legitimacy.

I asked my brother which one he thought I should stitch, he said 'the chicken'...
he's 30. sigh.

So I went with the robin (not a chicken). I tweaked it a bit just cos I could.
The body uses three strands of floss, 2 of DMC 436 and 1 of 818 DMC. I figured I had some extra colours might as well use them to add some character and three strands to make the body a bit bulkier / pronounced. This unfortunately resulted in the robin looking a little like a Christmas pudding. Hence the title it was honoured with once finished - "Christmas Pudding Chicken-Robin". Regardless I don't mind the effect.

I also made the eyes more defined and left off the odd white line. I was going to use a French knot if needed but the black eyes looked fine as is.

There are some people out thee who love backstitch, I am not one of them. It took me an extra day to bother finishing it for that reason.

I also didn't turn it into a brooch. The hoop is about 5cm in size and I thought it would look silly as a brooch. Instead I plaited up the leftover floss into a hoop to turn it into a tree ornament. Much better.


Finished:


Monday, 19 June 2017

Bright Stitches Scissor Keeper

Cute little kit completed to aid in my goal of not loosing any more scissors.

Kit: Needleworks by Sue Hawkins

Kit included;
18# canvas
DMC stranded cotton and needle
Chart and instructions.

Stitches used:
Rhodes stitch
tent stitch/diagonal tent stitch
Rice stitch
Satin stitch
French knot

It should also have been finished with a long-legged cross stitch on the edging but my brain couldn't handle all the messing around so I just stitched it however I felt. Worked out okay and with a lot less frustration than long-legged cross stitch.

The instructions on a whole didn't really agree with how my brain works so I spent a disproportionate amount of time scratching my head going 'hu'. And feeling pretty stupid. The instructions weren't in any way bad just not great for me.

My tassel was terrible and the thread to hold the scissors coming out the edge instead of the top. But otherwise pretty happy with the outcome. Fuzzy cat is as well, he's already attempted to liberate it as a toy...which might explain where some of the scissors have gone to.

Saturday, 17 December 2016

Sulpher Tuft (mushroom)

So a year or so later I remember I have a blog and figure why not update?

Here today we have a (fully finished) sulphur tuft cross stitch finished into a jar top.

The cross stitch is an old Allura Design - miniature, stitched on a piece of 12cm aida. I picked the cross stitch up ages ago at an Op shop for about $2-4AUD and like most of my craft things lately it sat and gathered dust. But recently I've been trying to do stuff again other than work and be miserable and today there was success.

Finishing something helps for sure.


The finished cross stitch:


And as a reminder of what type of mushroom it is I added the name using a spare bit of yellow/green and tan, just made it up as I went, with a little trial and error. I think it turned out nice:


I cut a circle of white felt to the size of a jar lid I just happened to have on the sink and located a small amount of stuffing to go between the lid of the jar and the felt. The stuffing I was hopping would smooth out the lid shape and the white felt so the black of the lid wouldn't show through the aida. I stuck down the felt to the lid with liberal use of the hot glue gun.

More liberal use of the hot glue and the mushroom was stuck down over the felt and to the lid;
Bit more glue to add a bit of ribbon and a little trim and done:


Wednesday, 19 August 2015

Sick kitty

Not much creating out of me lately,  just stress and more stress. Little Fenn kitty got sick :( he's doing better and home now but it's trown me for a complete loop.

Saturday, 15 August 2015

Slow Clay Pottery Centre

I've been taking pottery lessons since the start of the year of which I have completely failed to post any updates or finished products here. I'll do a post a full pottery update at the conclusion of this semester.  

On the Saturday 15/8/2015 and Sunday 16/8/2015 the studio where I have my classes had an open day. Since my Saturday was free I volunteered to help out. So many children...

But it was busy and fun :)

Here's a handful of photos I took at the beginning of the day before it was too busy;

Some little pottery bits and bobs that could be taken home for a donation to the rebuilding of the Nepalese pottery industry;

Some visitors to the open day having a go on the wheel under directions of the resident experts (it got a lot more hectic from this point onwards);

And the details of the studio:
Slow Clay Centre
13 Keele st, Collingswood 3066

It's really a nice place and I'm enjoying making a clay-y mess every week and the occasional success.

Sunday, 9 August 2015

Rest in Pieces Taxidermy Workshop

I enrolled to attend a day class in taxidermy. Read no further if you are particularly squeamish or are sensitive to the subject...!

I wasn't as focused as I would have like, my cat Fenn was on his 4th day at the vets and getting picked up (fingers crossed) by my brother while I was in the class. My brother had also torn his Achilles tendon that week. So I was stressed and pretty broke but I really wanted to do the class, I challenge you to find any other taxidermy classes in Australia. It's a pretty unique experience.

The company "Rest in Pieces" is fairly new, only founded a year or so ago and has been running full day courses/workshops to taxidermy mice (the only thing you can really do with a bunch of beginners in a day) throughout the year. 

The workshop had a maximum of 9 students, though we lost one who slept in and didn't make it in time. You really can't come in late. The group included a professional taxidermist wanting to practise something small as she usually worked on birds and restorations, one single guy (he was a giant!), some serious committed amateurs and a couple of beginner-beginners. 

The course took from 9am to 5.30ish for our group but if someone needed more time then it would have been given. No one goes home without a mouse! We learnt the basic processes involved in creating taxidermy. Learning how to skin and preserve a little mouse, as well as how to mount him into a standing pose with optional cheese. I was going to make some little props for him but the class was moved forward a month for me and I didn't have time. Someone did bring a little tutu (her mouse was tiny but the tutu was smaller so it ended up as a neck ruff - probably cuter that way regardless)

Everything was supplied on the day including the mice, tools, aprons, lunch and some (optional) wine. The mice were python feeder mice pre-frozen at the pet shop. The host named mine Chester. 

You can find more form this workshop and others @ instagram
#restinpiecestaxidermy @restinpiecestaxidermy
I don't bother with instagram so no pickies from me.

We were also advised to bring a strong tummy, I was pretty good with that until we got to the bit where we used a cotton bud to get his brain out...gross. But I got past that brief squeamishness.

After his hide was treated and we had lunch we came to the part of rebuilding our mice back into mouse shapes and not tiny little mouse skin rugs. Around then there is a point were you wire him up like a deranged marionette. There was wire sticking out everywhere. 

I hate hand stitching and at the end  we had to sew up his back. My sewing was pretty rough, and near the top I tore the skin a few times so he has a bit of a ruff where I put in multiple stitches to hold him all together. I was pretty tired by the end of the day.

I'll save you from the more gruesome pictures - well his insides no long inside anyway - the body including the tail comes out as one piece it's weird yet fascinating.  But here's the finished product and a work in progress shot (skin only)

Behold, Chester the mouse;

And some of the ambiance in the workshop; 

And a work in progress shot, the skin after removing it;

Sunday, 5 July 2015

Tatty Teady, Christmas Coat

I haven't really felt like blogging recently, too much work, not enough hours in the day. But I have been working (very slowly) on finishing some half started projects.

This guy I started ages and ages ago, put aside and...yeah completely forgot about it.

The design is Tatty Teddy, Christmas Coat by Anchor.

The kit contained the usual 14 count white Aida fabric, Anchor stranded cotton, a chart, full instructions and a needle.

Finished size: 11 x 8cm.

One thing the picture doesn't really show is the snow and his boots have a thread of glittery blending filament which in person looks quite nice.

Stitching him was relatively straightforward once I re-started. Though almost at the end doing the french knots the cat distracted me. I lost a needle, which I anticipate finding with my foot or other soft body part when I least expect it, and accidentally yanked 2 of the french knots out. It was not my finest moment.

So the back is messier than I'd like and when I frame it I'll need to put some soft wadding at the back to deal with the knots I couldn't fix but other than that one cute teddy WIP completed.

And a WIP shot from earlier today;


Saturday, 30 May 2015

Western Australia

I had an actual real holiday (for whole a week). Travelled over to Western Australia to see the other coast. Twas great, left cold wet Melbourne for 25 degree days and not a drop of rain.

Flew to Perth and met up with my sister who'd been visiting friends South Australia and flown into Perth a little later. My sister and I hired a car drove up to meet my father and his partner Jennie in Denham, they're doing the grey nomad thing for 6months and are currently travelling with their camper up the west side of Australia. For people not in the know the drive Perth to Denham is a 9 and 1/2 hour one way trip. Needless to stay we stopped roughly half way in Geraldton to get some much needed sleep.

We would highly recommend the Foreshore Backpackers, clean, convenient and as the name would suggest right on the foreshore. It would have been nice to stay longer but we only had a week and a lot of driving to do.

A word of caution, if your hire car beeps at you it's probably trying to tell you something. On leaving the backpackers we discovered the car wouldn't start...why, why, why? Then I ask the dreaded question, did we leave the lights on last night? shoot. Fortunately Hertz had road side assist with their vehicle and by the time we had finished breakfast at the Jaffa Hut on the corner we had been rescued!

Drove straight to Denham with only a quick stop to check out shell beach, which as its name would suggest is a beach made up entirely of shells. They're very literal with a lot of their place names in W.A. In Denham we stayed at Denham Seaside Tourist Village, which is NOT as Jennie first directed us to the Shark Bay Caravan park. The first was an excellent place to stay with good facilities and a great views the second is a tiny, slightly spooky, fairly dialect place in the 'centre' of town. Thankfully we were staying at the nice place. :)

We used Denham as a base while we visited Monkey Mai, where they feed the dolphins, and had a look around the area. At Monkey Mai we got see the dolphins, saw a green turtle, little shark and had a buffet breakfast/brunch.

After we had a walk around little lagoon (managed not to step on a stone fish) and had an up close look at the wind turbines - I love them :) so useful in generating energy and interesting on the skyline. You can't get so close to the ones in Victoria.


The next day we headed in to camp in Francois Peron National Park. FWD access only, so much fun! 

On the way in we stopped at the old Peron Homestead and had a splash
in the artesian hot tub before heading into the National Park to camp. We decided on the South Gregories as the place to set our camp for the 3 night's we'd be there. The camp sites were spread out and there were only 3 sites per 'loop'. With South Gregories having two loops. You practically had a private beach.

Dad caught some fish, including a wobbegong (shark) - by the tail, with his hands, after it broke his hook...he be a crazy man my dad. We had some vehicle issues so Wayne camped next door came to our rescue with a jump start (twice) and on the way out dad got distracted chatting with us and the car got bogged, again Wayne, also heading out, to the rescue. So yeah Wayne was our hero.

Saw Skipjack point and sis and I walked the 1.5km Wanamalu Trail down to Cape Peron where dad and Jennie met us with a thankfully working vehicle. Sis almost stepped on a snake (python) at the start of the walk - he was a very chill snake though and just slowly slithered off to do his own thing. She spent the rest of the walk delighting in pointing out snake trails...brat.


On Saturday we said goodbye to dad and Jenni to head back down to Perth, again stopping in Geraldton to sleep (backpackers again and same room even). On the way out of Denham we picked up a couple of backpackers and took them a few hours down the road to the Overlander. They were from Malaysia and aimed to travel right round the county, good on'em. One of them was actually a girl we'd seen at Monkey Mai earlier in the week as a volunteer for the dolphin feeding. Serendipity :)


On the way back to Perth before Geraldton we detoured to Kalbari National Park to check out the Natures Window and view.

On the way in we literally drove over a spiny dragon lizard pretending to be a leaf - in the middle of the dirt road. Fortunately he was right in the middle of the car so we didn't squish him. We stopped and shoo'd him off the road. Made the day - so cute, so dumb.


Then the next day we took the coastal road towards Perth and stopped at the Pinnacles in Nambung National Park and had a walk around them. Then lunch, they do some good calamari along the W.A. coast, and home. Our lovely brother picked us up from Melbourne Airport at 11.45pm in the wet and cold. Holiday over.


Sunday, 19 April 2015

Woodland Christmas kit - owl

This little guy was made using the designs and items from the free kit that came with Cross Stitcher October issue number 284. There are 5 designs, a deer, hedgehog, owl, badger and fox. The original design was for some felt Christmas decorations but I didn't really see the point I making them as I never put up a Christmas tree. Seemed pretty redundant.  Instead I decided to wing it and make some sewing accompaniments.  First off the bat is the owl design - made into a scissor fob.

I did the owl on one side as per the pattern, two threads over two. Then on the other side I made a itty bitty owl using one strand over one. He was a bit fiddly and I'm unsure if all my crosses ended up fully correct but in the end looked incredibly cute. 

At the bottom before I sewed it all up I should have made sure it was a little more pushed out. As it is one side looks a little squished. And it did have a tassel but I didn't like it so snipped it off. I used some random ribbon to embellish the top and glue along my rough stitching on the left side.  And all done. Next up I think a pin keep. 

Saturday, 18 April 2015

Tuesday, 14 April 2015

Snow Much Fun

I started this little guy ages and ages ago. He's a free Fizzy Moon kit from Cross Stitch Card Shop - issue 92. Once the cross stitching was done I tried to do the french knots for the eyes. Hated them so shoved the stitching in the magazine and threw it in the magazine holder. Promptly forgot about it.

Today I decided to clean. Got as far as flicking through my craft magazine's to see what to get rid of and what to keep before finding this little guy almost all done. Seemed a shame to not finish it now that I'd found it again. (See here a master procrastinator at work)

I cut off his horrible french knot eyes and tried again...and again and again. His eyes are really just ugly. Too closely spaced and made him look like a bizarre zombie snow teddy. Even the ones in the magazine example didn't really look all that great.  In the end I added another black french knot in the middle of his white french knot eye to make a black pupil which I think help make him look better. At least not so demented anyway just a bit googly eyed. 

I had a few gripes, I almost ran out of white and cream and the two red colours used seemed too similar to really make any impact.  I can't even really tell from the finished product that two different reds were used. The button on his belly could also have done being a different colour to stand out more. I was going to use a real button but my cat ate it. Really just gave it a sniff, I blinked and it was gone. 

It seemed like the design could have done with a bit of tweaking before being released for production. But all in all just what you'd expect from a little freebie kit. 

The card that came with the kit is long gone. Not too bothered since I don't really 'do' cards. I have no idea what I'll do with the finished design. Maybe  a gift of some kind...

Post french knot eye surgery tonight;
Finished product;

Monday, 13 April 2015

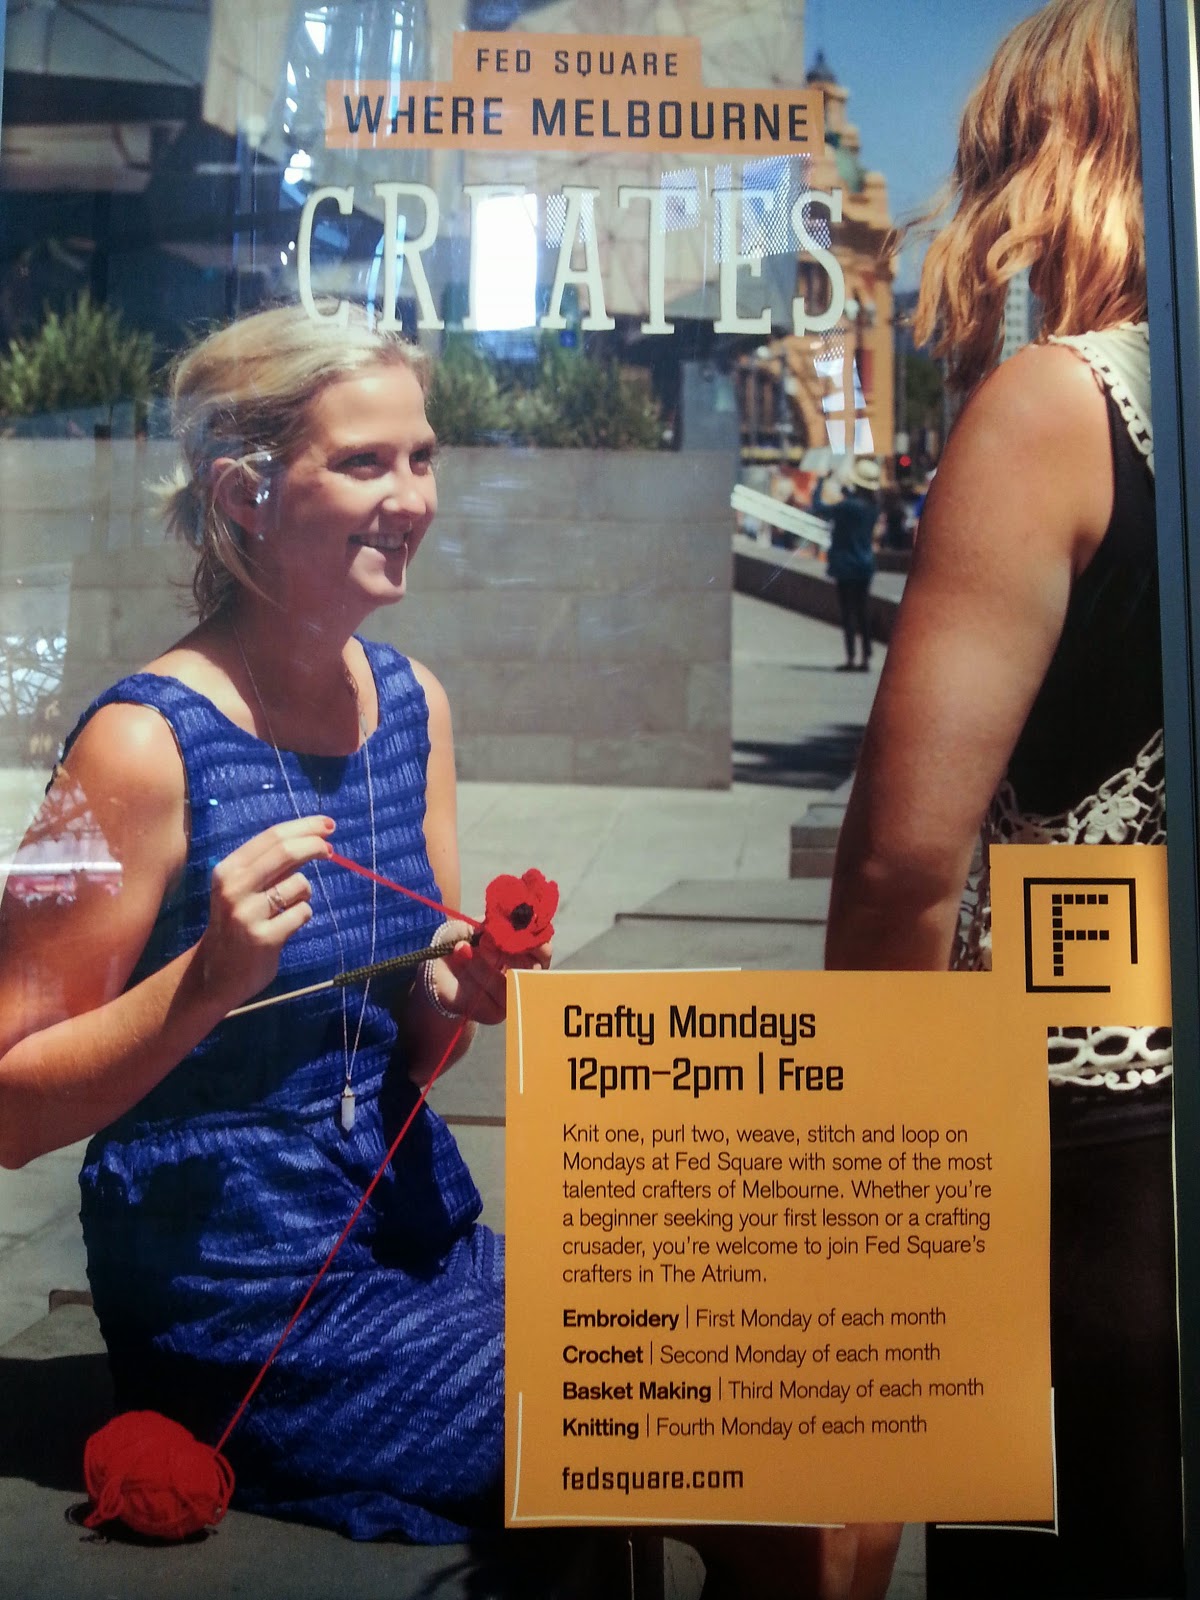
Crafty Melbourne

Crafty Melbourne :) 

Free group creating in the city Monday's between 9/3/15 to 14/12/15. Shame work will prevent me attending it looks like fun. 

If you get the chance visit Federation square (still one of the ugliest architechture concived) for some crafty fun.
 

Sunday, 29 March 2015

5000 Poppies; at the Flower and Garden show

 So the other day I went to the Melbourne International Flower and Garden show.

Really the display gardens at the show were on a whole average and there was only a handful. I enjoyed the day because flowers and I went with friends but they really need to ramp up the 'garden' bit of the Melbourne International Flower and Garden Show

But on to the highlight, the '5000 poppies' group had an awesome display created by Phillip Johnson / Phillip Johnson Landscaping. I'll let the pictures speak for me: