
Saturday, 31 January 2015

Monday, 19 January 2015
Tartan Thistles Scissor keep
Something finished for the new year!
I sort of don't really like the finished product but it'll do the job (hopefully) of stopping me from loosing my little scissors... once I eventually find a pair again to attach. My house seems to absorb scissors like it's nobody's business hence the need for some scissor keeps.
This is another kit from Textile Heritage (Art Pewter Silver Ltd) like the Tudor Rose one I completed in August 2014. After I finished an gave away the rose I decided I wanted/needed one for myself. I like tartan and purple so this one seemed like a safe bet at the time. I might have to do a Tudor Rose for myself in the future since I liked the finished product significantly more than the Thistle.
I haven't had a lot of free time to stitch lately and I don't think that's going to change. I did think I might get some more stitching time by taking it to work and doing a little bit of work during my breaks. Valid idea but didn't really work. First I accidentally stitched the 'grey' stem on the thistle with the white instead of grey. In my defence the grey in the kit looks very much like a shade of green, at no point did I look at the 'grey' and go 'yes you are clearly the grey in this kit'. Instead it was 'well you're not any of the other colours, must be the grey...' I notice fairly quickly so only had to pull out around 10 minutes of work. Frustrating none the less.
I also managed to get a drop of green tea on the Aida, hazards of stitching during my tea break. Fortunately not on the design but it convinced me that stitching at work wasn't really going to work. Green tea sure can stain.
On a whole this stitch was actually fairly dull. Doing the tartan background felt way too much like hand sewing (which I might possibly hate) and there was a fair bit to do. I'm not really a fan of hand stitching, that's one of the reasons I have a sewing machine. Nothing in the design really stood out, this is probably part of why I'm ambivalent about the finished product.
The tassel I made is fairly average and set too low. It should be sewn in much closer to the cross stitch. Again I stitched up the hole used for stuffing like a noob. It looked pretty average. One day I'll have to get some finishing advice for projects like this so it can look nice all round.
But after all that complaining it's done and will be organisationally useful so time not wasted.


 |
| ***And here it is in my handbag on the way to work with my random golf ball!*** |
Sunday, 18 January 2015
Happy New Year.
I haven't been doing a lot of craft this year, been busy with trying to be healthy and with work. I did finish a cape but it was a gift and unfortunately I don't have any photos at this time - if I ever manage to get some I'll do a post.
I should finish something soon BUT until then I'll leave the internets with another cute cat picture.
He he, silly kitty.

Thursday, 4 December 2014
The Finishing of 3 little mice : baubles
I decided how I wanted to finish up my little mice designs pretty early after completing my first one. I wanted them in clear baubles to go on my sister's Christmas tree if she has one this year. (Otherwise to a friend or two who will)
I had an (admittedly very quick) look through the local shops but couldn't find what I wanted for the baubles. Though I was certain they existed. In the end I just took the easy though somewhat expensive option and brought them through ebay. Ebay is no always a bargain particularly if you take into account postage. I also had to buy 10 when I really only needed 3. But the others can be used as the manufacturer seems to recommend which is to fill with lollies or treats to hang from the tree.
I did want to use 'Iridescent Easter grass' for the other side of the bauble but you may notice that it doesn't happen to be anywhere near Easter so settled on tinsel instead. Correct festive season and locatable in abundance at a shopping centre near you!
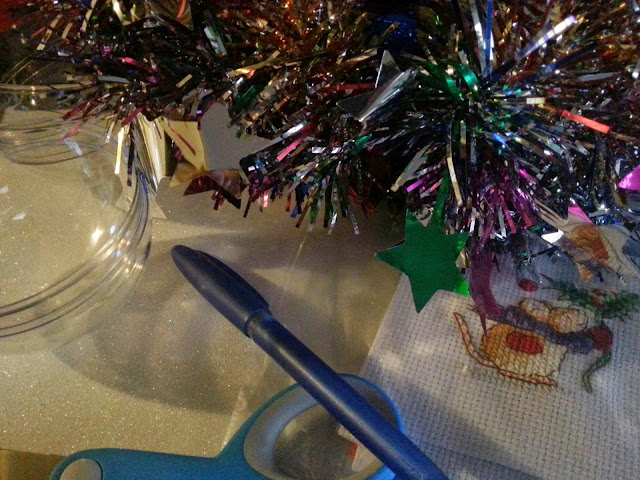 Items used:
Clear Baubles
Tinsel
White Sparkly adhesive foam
White Sparkly adhesive foam
A pen
Pair of scissors (a Stanley knife would do the trick too but I've lost mine...after stabbing myself with it. I should maybe not be allowed to play with sharp object without supervision. )
Pair of scissors (a Stanley knife would do the trick too but I've lost mine...after stabbing myself with it. I should maybe not be allowed to play with sharp object without supervision. )
...
And my finished designs of course.
And my finished designs of course.
First I traced around the bauble on the back of the foam making a circle. I cut out three foam circles on the inside of the line, to make them just a tiny bit smaller to fit inside the baubles. I wanted them to fit in comfortably but fixed enough the designs wouldn’t move about.
I then peeled the back of my foam circles and lined up the mouse to sit as much in the middle as possible. I was very glad I chose the 8cm baubles and not the 7.5cm ones I was tossing up with. 8cm gave just enough space to look good but allow the mouse not to have to be crazy precise. 7.5cm would have been frustratingly fiddly.

Please excuse the reflection of my hand in a few of these photo's.


Itty Bitty mouse (3)
So last night I finished the third and last Margaret Sherry little mousie from the World of Cross Stitch 3-in-1 kit.
This one unfortunately had a few more 'blips' in the stitching than the other two.
Firstly I don't recommend stitching while exhausted. A long 10 hours of work plus 2 hours travel time does not make for a switched on brain. I completely missed that I'd grabbed the pink instead of the peach - twice. So his feet and ears were in pink instead of peach. It wasn't too noticeable UNTIL I stitched the pink in the correct place (his cheek). Then I'm sitting there going, 'those colours look a lot alike... awhhhh shoot'
And here be my little bundle of shame, all a frogged:

Also during my tired stitching I didn't notice I'd picked up the white that had a bit of brown on it. It came in the kit with a smudge of brown on one end. Either somehow contaminated while getting dyed or stained some other way in transport. I was going to trim it off but accidentally used it instead. The end result is a browny cross on his belly where there should be white. It's not too noticeable and doesn't really affect the overall design so I didn't unpick the white. If I'd had to I probably would have abandoned the design. I have a lot to do at the moment and indulging in cross stitch is just that, indulging.
It was also a little confetti-ish in some places and I missed a few crosses (4 or 5) Not hard to correct but annoying none the less.
So here be little mousekewitz number 3 in his finished 6x6 glory:

And one lonely little WIP shot:

Sunday, 30 November 2014
Itty Bitty mouse (2)
Little Christmas mouse number two. The second mouse from the 3-in-1 Margaret Sherry kit that came with The World of Cross Stitch.
I pretty much said all I wanted to say about this kit in the last post so I’ll be light on words here.
Each design is about 6x6cm and takes around 3-4hours to complete. Definitely no more than 4hours. In this design I mixed a strand of purple metallic Madeira #4012 with the darkest purple on the bauble. It was a free sample that came with another magazine a while back. I think I should probably have added a strand to the light purple too in hindsight. But it's too late now so I'll stick with being happy with what I've done.
I do know how I'm going to turn them into ornaments. I'll save it till they're all done though. Fingers cross it works (I like it when my ideas work out).
Completed project:


Thursday, 27 November 2014
Itty Bitty Mouse (1)
Some actual cross stitching! Gasp. I won't have to change the name of my blog after all..maybe.
Yay to free magazine gifts, though considering the cost of the magazine and that the 'freebies' are more than half the reason I pick up a copy not really free-free I guess. Regardless yays anyways.
This little guy is from the 3 in 1 kit that came with issue 220 of The World of Cross Stitching. I probably don't even need to mention the designer (Margaret Sherry of course) as the design/s are very distinctive.
I complained about the design of the fathers day card I did a while back not being really workable at the size it was. This kit on the other hand is perfect and clearly they have been designed to be stitched tiny and cute. All the definition comes from the backstitching but the cross stitch colours are exceptionally harmonious. All in all what you can expect from a Margaret Sherry design.
Also the completed design pictures in the magazine were lovely. Whoever stitch them deserves significant kudos.
This guy was really quick to get done. A little stitching after work and here you go. One cute little mouse waiting to be turned into (I think) a Christmas ornament.
I made a shmozzel of his tail. I couldn't really work out where I was meant to be putting my stitchs based on the chart. In hindsight I can see how I should have worked it but at the time it was a mystery. I really just made it up, sort-a kinda. It's also a stitch longer than it should be since I accidentally added an extra cross. Being my only real mistake it doesn't really bother me too much. Still looks cute.
The only thing I though after completing the white on his hat was I should of added some metallic thread and/or blending filament to make it sparkle a bit. Woulda been pretty. Oh well too late now and it's still much cute as is.


Subscribe to:
Posts (Atom)